Choice Cioppino and Chowder at Ray's Cafe

What: Seafood; Italian and American food

Where: Ray's Cafe in Seattle, WA.

Must Order: Ray's Northwest Cioppino; clam chowder soup

The Verdict: I'm a sucker for seafood. More than that, I'm a snob. A slightly overcooked shrimp has me wrinkle my nose and a fishy-tasting fish makes me shudder. Thus, anyone who can adroitly pick out the pin bones in a fish, who knows to yank a just-pinked shrimp off the grill and can properly cook up a fish without charring the skin definitely has my respect. And at Ray's Cafe, they certainly know their seafood. What else would one expect from a swanky (but not too swanky) establishment overlooking Puget Sound?

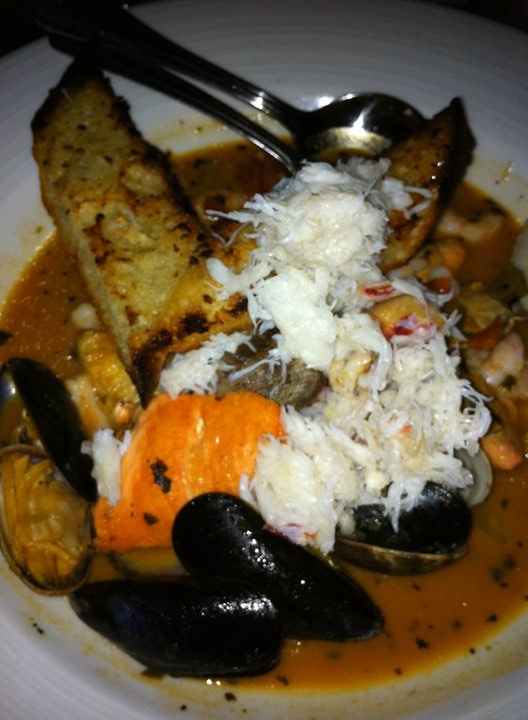
Two dishes in particular that are the stand-out stars are Ray's Northwest Cioppino and the Clam Chowder Soup. For only $19 you can enjoy all your favorite fish, shellfish and crustacean simmered to perfection in a tomato-saffron broth. The entree comes with manila clams, penn cove mussels, dungeness crab meat, whitefish, salmon, shrimp and two slices of garlic bread neatly tucked in. All the seafood is fresh and and provided in appropriate portions. There's enough of each item to satisfy your palate yet somehow leave you wanting more. As for the broth, the saffron ever so slightly mellows the tartness of tomatoes so that no flavors are lost.

The Clam Chowder Soup, meanwhile, is a dish you expect Ray's to have just right -- and it does. It's thick and chunky, with enough clams and potato wedges to fill you up. I recommend splitting a cup (for $5) with a friend to ensure you're still hungry enough for the entree.

A Guaranteed Show-Stopper: Red Velvet Pancakes

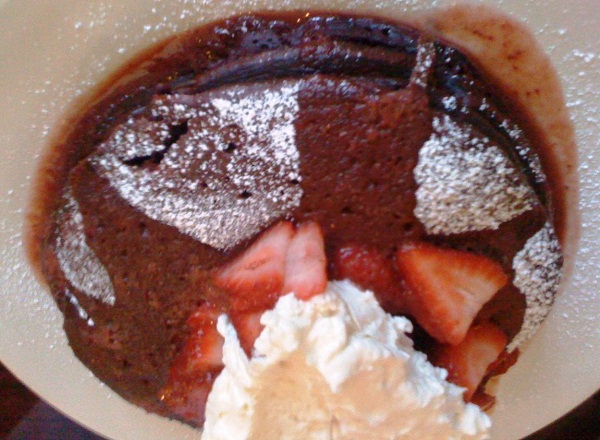
Red velvet pancakes. Need I say more? Whenever I hear the words "red velvet" my ears instantly perk up. Cake? Cookies? And this time, pancakes? A friend of mine linked me to this recipe not too long ago and just by glancing at the ingredient list, I could tell this was a must-eat. So I zipped over to the grocery store and stocked up on the necessities. Even though many of the ingredients weren't already lurking in my kitchen, it was well worth it. It was easy to make and difficult to screw up. The end result is moist, fluffy and absolutely irresistible. I wish I could brag that I made all sorts of changes to the recipe, but I didn't change much at all. The full credit goes to a food blog called From Portland to Peonies.

Serves: About 6 Prep time: 20 minutes Cook time: About 10 minutes

Ingredients: 1 cup all-purpose flour 1 teaspoon baking powder 1/2 teaspoon baking soda 1/4 teaspoon salt 3 tablespoons white sugar 2 tablespoons unsweetened cocoa powder 1 large egg, lightly beaten 3/4 buttermilk 1/4 cup sour cream 3 tablespoons unsalted butter, melted 1 tablespoon red food coloring 2 teaspoons vanilla extract Maple syrup or whipped cream (optional)

1. In a large bowl whisk together the dry ingredients first. Add in the egg, buttermilk, sour cream, melted butter, red food coloring, and vanilla extract. Mix until combined.

2. Heat a frying pan or griddle over medium high heat. When hot add non-stick cooking spray, followed by a small scoop of the batter. Wait for the pancakes to bubble, about 2 minutes, flip and cook for a minute or two more. Top with a pat of butter and maple syrup, or whipped cream.

My Notes: Creme fraiche or sour cream? If you're like me, you probably frequent grocery store chains like Ralph's or even Whole Foods. Creme fraiche can be hard to find, so I made these pancakes with sour cream -- and I wouldn't change a thing.

More vanilla and baking soda: I love the fragrant, floral sweetness of vanilla, so in this recipe, I added a little dash extra. I also used extra baking powder to ensure a fluffy yet dense pancake.

Make it dessert: A friend of mine declined the butter and decided to take this treat to the next level. Instead, he added a generous scoop of vanilla bean ice cream. Ice cream makes just about any food better, and these red velvet pancakes are definitely no exception. If you decided to go with ice cream topping, you may want to make your pancakes a tad smaller. The portions will be less filling and ultimately, less guilt-inducing!

Get Old-Fashioned at Top Pot Doughnuts

What: Doughnuts, pastries, coffee and tea

Where: Top Pot Doughnuts in downtown Seattle, WA.

Must Order: Old fashioned doughnuts, including glazed and pumpkin; ovaltine latte

The Verdict: So what? They're just doughnuts. Ah, but often, it's the simpler foods that catch our eye. Certainly, unusual foods pique my interest, but when I hear about an ordinary dish that's served up in a memorable way, I do a double-take.

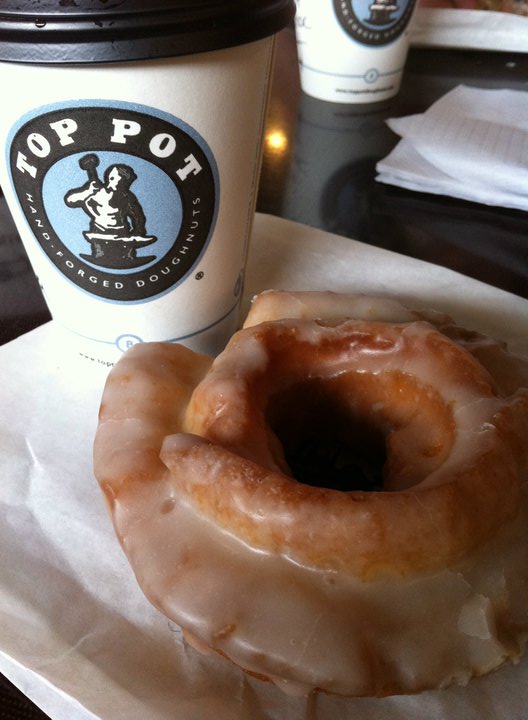
You may have heard of Top Pot Doughnuts in the news recently; President Barack Obama stopped by in October and treated himself (and, I assume, his sizable entourage) to a few dozen doughnuts. The friendly staff at Top Pot revealed that the president himself enjoyed the Pumpkin Old-Fashioned Doughnut. That, indeed, was one of the establishment's better doughnuts, but my personal favorite was Old-Fashioned Glazed. It was simple, it was sweet and best of all, it packed that ever so slight resistance when I bit down.

Sweet treats aside, another must-order is the Ovaltine Latte. I'm a big fan of both hot chocolate (when it's made correctly) and lattes. Top Pot fuses them together with this drink. With the sweetness of the chocolate and the kick of the coffee, you get the best of both worlds in this velvety drink.

A Spicy Twist On A Classic Finger Food: Cilantro Crab Cakes

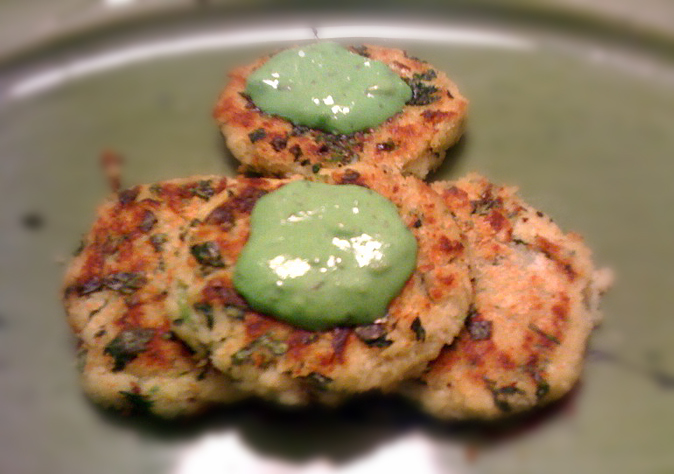
We all know that when you're hosting a party or even just a small get-together, it's important to have a decent array of snacks. You'll probably have the requisite meat-and-cheese platter, a bowl of party mix, a tray of pinwheels sandwiches and maybe -- if you're like me, a 20-something year-old junk foodie with other 20-something year-old junk foodie friends -- a punch bowl filled with Doritos. Sure, it's convenient to load the kitchen table with store-bought snacks, but it's nothing compared to homemade treats. I like to offer a mix of both grocery goodies and home-cooked fare -- and this cilantro crab cake recipe from Marcela Valladolid is perfect for parties. It's easy to prep and cook, too: simply mix the ingredients in a bowl and quickly fry the small cakes to golden goodness. They're crabby, they're spicy, and, laced with lime juice and cilantro, they even have a Mexican flair.

Serves: 4-6 crab cakes Prep time: 20 minutes

Ingredients Cakes: 12 oz canned crab meat (usually 2 6-oz cans) 3 tablespoons mayonnaise 1 medium egg, beaten 1/2 cup panko bread crumbs 1/4 cup chopped scallions 1/4 cup finely chopped chopped cilantro leaves 1 tablespoon fresh lime juice Salt and pepper, to taste 1/2 teaspoon habanero hot sauce (optional) Guacamole (optional)

Breading: 4 tablespoons vegetable oil 1 cup panko bread crumbs 1/4 cup finely chopped cilantro leaves

1. Mix the ingredients for the cakes in a bowl. Separate the resulting mixture into 1/2-3/4 inch patties.

2. Brush a thin layer of vegetable oil on each patty, then coat both sides of the patty in pank bread crumbs and cilantro leaves.

3. Heat a drizzle of vegetable oil in a pan and fry each patty until medium golden brown, about 2-3 minutes on each side.

My Notes Extra mayo and less egg. Marcela's recipe calls for a touch less mayonnaise and a large (rather than medium) egg. I added the dash of extra mayo to make the crab cakes creamier, and I went with a smaller egg in order to make the end result less, well, "eggy." Some crab cake recipes don't use egg at all -- but it's important. Egg serves as an adhesive so that the cakes will be more pliable and won't fall apart.

Why habanero hot sauce? The first time I made this recipe I didn't have habanero hot sauce in my pantry; instead, I settled for Cholula. Though it didn't adversely affect my crab cakes, there was no spice. Habanero hot sauce, on the other hand, is strong enough to withstand the cooking process. But if you prefer, you can skip the hot sauce altogether.

Store-bought guacamole? In this dish, the guac serves as a garnish rather than as the star of the plate. While you could mash your own batch of it, it may be a better use of your (limited) time to buy a carton at the store. When I do this, I usually sneak in a squeeze of fresh lime juice and pinch of garlic paste to give the flavor more depth.

Beer for the Bold: Lobotomy Bock and Blueberries

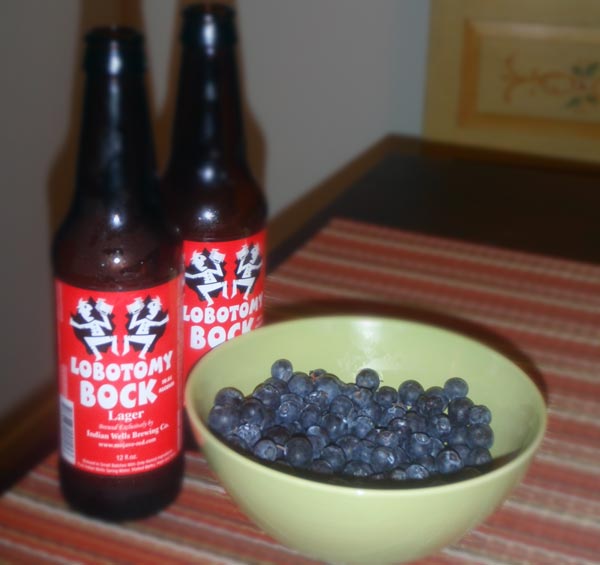
I'll say it first: It's weird. Truly. Beer with lemonade is unusual enough, but mixing it with blueberries? I stumbled upon this little drink/snack mix the other day. I had some friends and family over to watch the Lakers-Celtics game, and seeing as how it was Game 7, I knew I had to have a decent array of goodies. I bought beer, ordered hot wings and put out a bowl of fruit for some cool refreshments.  As we closed in on the second half of the game, I popped open a cold bottle of Lobotomy Bock and anxiously noshed on food within arm's reach -- the bowl of blueberries. I was instantly blown away by deep flavors, the contrasting tones. Somehow, this combination makes the booze 'n berries taste earthy and vibrant, with a new layer of richness. The blueberries become sweeter and the beer tastes more comforting, almost like chocolate-flavored coffee. This is definitely a must-try -- snack on the berries while sipping on beer, or mix the two for a thick, robust drink.

Ingredients (for a mixed drink) 1 bottle of Lobotomy Bock 1/4 to 1/3 cup of blueberries

1. Add blueberries to an empty pilsner and pour beer over it. Muddle the berries by smashing lightly with a spoon or whisk, then stir gently.

Where do I get Lobotomy Bock? So far, it seems this dark Californian beer is available only at Whole Foods.

Fresh, Salty and Simple: Prosciutto-Basil Crostini

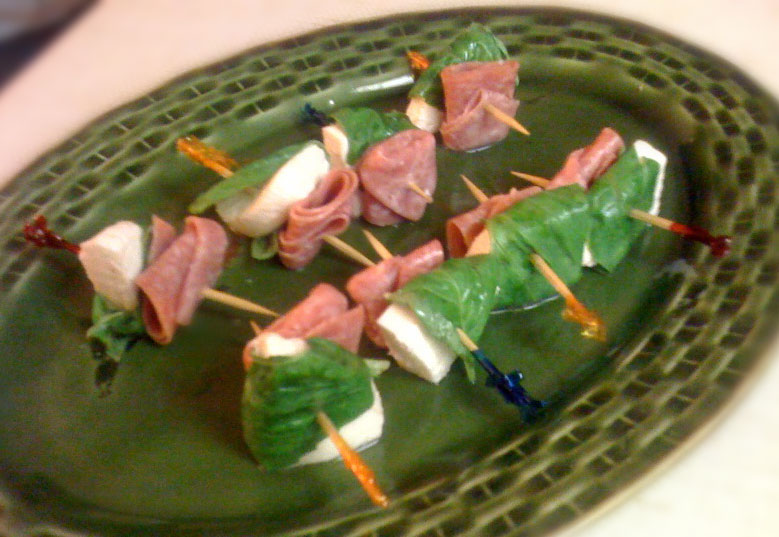
This quick little recipe combines three tasty, savory ingredients: prosciutto, basil and French bread. It's light, it's salty, it's herby, it's crunchy. Would more could you want in a finger food? Just be sure to use the freshest ingredients so each one can stand out on its own. Since it's a Martha Stewart recipe, I'll have to admit it's perfect. I didn't change a thing -- the only thing I did differently was use a toaster oven (and write up a simpler ingredient list).

Serves: 4-6 Prep time: 5 minutes Cook time: 10 minutes

Ingredients 12 slices of baguette (1/2 small baguette, cut diagonally into 1/2-inch-thick slices) 2 tablespoons extra-virgin olive oil, plus more for drizzling 1 tablespoon sea salt (or to taste) Freshly ground pepper 24 fresh basil leaves (at least about 1/2 the size of each bread slice) 4 ounces thinly sliced prosciutto (or 12 slices of prosciutto)

1. Lightly brush both sides of each bread slice with oil. Season with salt and a little bit of pepper.

To heat, using an oven: Preheat oven to 400 degrees. Transfer bread to a rimmed baking sheet. Toast in oven until pale golden, about 5 minutes per side. Transfer sheet to a wire rack or plate; let crostini cool completely.

To heat, using a toaster oven: Preheat toaster oven to 300 degrees. Toast bread until pale golden, about 3 minutes per side. Transfer sheet to a wire rack or plate; let crostini cool completely.

2. Place two basil leaves and a folded slice of prosciutto on each bread slice. Drizzle lightly with oil. Season with a little bit of freshly ground pepper.

My Notes: Oven or toaster oven? I'm sure most chefs and many foodies would insist you use a regular oven. But if you have a small kitchen like I do, you probably don't want to heat up that corner of your living space for a few slices of bread. I prefer to use the toaster oven because it uses less energy and the bread heats faster.

What kind of prosciutto? Because this recipe calls for so few ingredients, it's important to make sure you use good quality ones. You could go with a pre-packaged prosciutto but I find those sometimes tend to be a bit slimy. I prefer to use freshly-sliced Canadian prosciutto from the Whole Foods deli. It's definitely not soggy and is quite lean -- just the way I like my prosciutto.

Why freshly ground pepper? Believe it or not, freshly ground pepper tastes different from the more commonly-used coarse grind pepper. Grinding the peppercorns releases their oils and greater flavor. Plus, this fresher variety makes your finished crostini look even more beautiful.

A Refreshing Summer Drink: Lemonade and... Beer

Picture this: It's a blistering hot day. The sun is beating down directly on you to the point where your scalp is itchy. What drink are you craving? As much as you love a cold brewski, you're probably thinking of a tall glass of lemonade, or even a bottle of ice water. I love a good beer: blonde Hefeweizen, maple-colored Jeremiah Red, easy and cheap Bud Light -- as long as it's not Newcastle, I'm happy. But in the sweltering heat? No thanks! This fun and refreshing drink, however, changes that attitude completely.

I first tried this concoction in Germany and Austria, where they called it a "Radler" or a "Russian." It's so simple I couldn't believe I hadn't come across it sooner. All it is is beer and lemonade. That's right, just two ingredients. But it's amazing how the two complement each other. The drink retains the fizziness and "hoppiness" of the beer, but laced with notes of sweet and sour from the lemonade. Use as much beer or as much lemonade as you'd like. Cheers!

Ingredients 3/4 to 1 bottle of Miller Genuine Draft (or a medium-bodied beer) 1/4 cup Newman's Own lemonade

1. Pour beer into a pilsner. Fill with lemonade. You can use more or less lemonade, depending on how you prefer the taste.

My Notes: Does it have to be Miller Genuine Draft? Not necessarily, but it's the one I most highly recommend. I just found MGD to taste similar to some of the German and Austrian beers I had during my trip. I've also had this drink made with Bud Light Lime; the result is an even lighter, almost floral flavor.

Does it have to be Newman's Own lemonade? If not Newman's Own, you should use a lemonade that's tends to be less sweet and more sour. The key is to utilize that oomph you get from a lemon. You can also use a carbonated lemon water if you want to infuse even more fizziness in the drink.

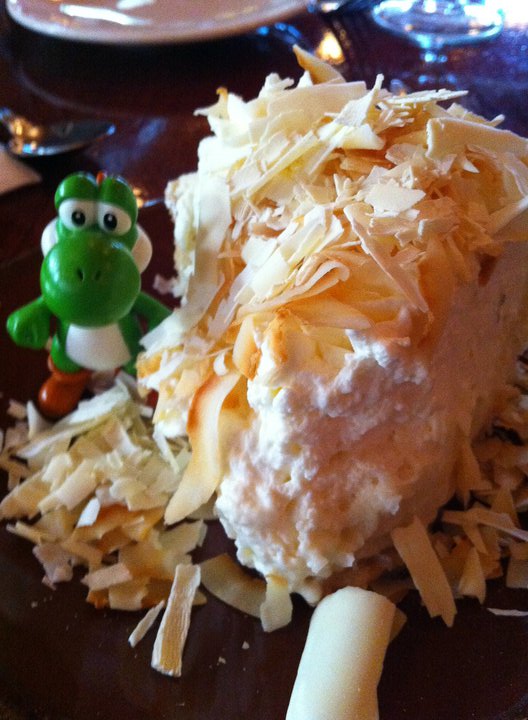
Editor's Note: In case you were wondering, yes, that is a small Yoshi toy in the picture.

A Light, Easy, No-Cook Dessert: Strawberry-Ricotta Mousse

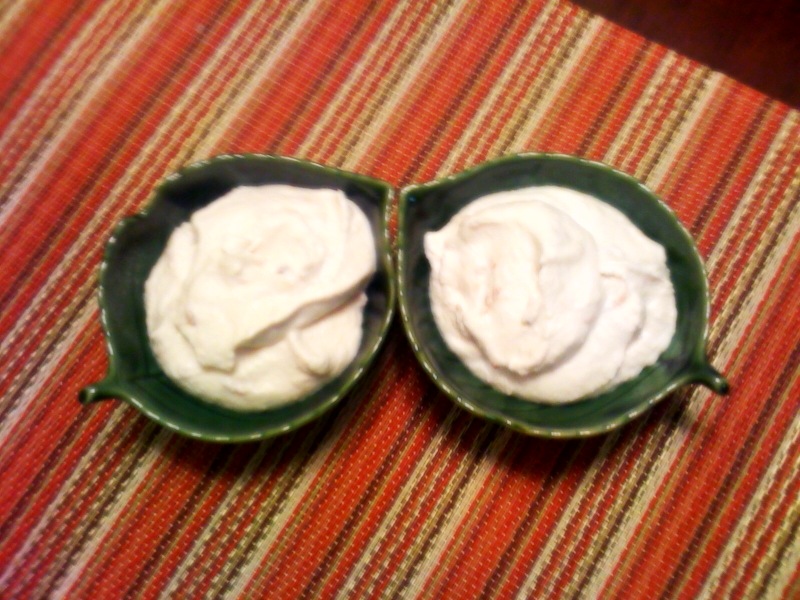
I’m actually not the biggest fan of mousse. It’s usually too chocolate-y or too bland, too soft or too sweet. Too something. But this recipe, taken straight from the Food Network’s Giada De Laurentiis herself, has just the right consistency – and with a few of my own tweaks, just the right level of sweetness. It’s super easy and best of all, it doesn’t require any cooking.

Serves: about 10 Prep time: 20-25 minutes

Ingredients: 2 cups whole milk ricotta (or 1 15-ounce container) 3/4 cup of strawberry preserves or jam (can be substituted for your favorite preserves or jam) 1 cup heavy whipping cream 1/4 cup powdered sugar

1. 1 cup of strawberries (or the same kind of fresh fruit as your jam) Either in a food processor or mixer, blend the room temperature ricotta cheese until it’s smooth and fluffy (usually about 30 seconds in a food processor, or 1 minute in the mixer). Add the jam and blend until combined, about several seconds until you get that nice, light pink color. Transfer to a large mixing bowl.

If you’re like me and your kitchen appliances are both small and limited, you’ll probably need to wash and dry your mixer. You’re going to whip the cream, so you’ll want to make sure you have a clean mixer to make sure the cream becomes the right consistency.

2. Beat the cream on medium-high speed until thick, about 5 minutes. Add the powdered sugar and crank up the speed. Blend until the cream holds stiff peaks, about 5-7 minutes longer.

3. Fold (or gently mix) the whipped cream into your ricotta-jam mixture in small batches.

4. Refrigerate 1 hour prior to serving. When ready, use an ice cream scoop to plop a generous portion onto your serving bowls. I use one hefty scoop per serving. Garnish with your fresh fruit and enjoy!

My notes: Mine vs. Giada’s. When I first whipped up this dessert, I followed Giada’s recipe down to the last measurement. While I was happy with the texture, I felt the end result was a bit too ricotta-y and not quite sweet enough. I like a little extra jam and powdered sugar.

Which jam? Giada’s original recipe actually calls for raspberry jam. I’ve also seen this made with blueberries! Feel free to use whichever preserves or jam you like – it’s probably a good idea (for your wallet!) to choose one that’s on sale. Just don’t use jelly! You want the full-bodied taste of real fruit, and that’s a taste you get only from preserves or jam.

Why whole milk ricotta? For a more calorie-friendly treat, you could go with skim milk ricotta. I just prefer using whole milk to get a richer flavor and that perfect mousse-y texture. Also, when you’re making recipes with so few ingredients, it’s important to make sure they’re good quality. Using fewer ingredients means you can’t hide the tastes of cheap items!

Why powdered sugar? Powdered sugar is much lighter than granulated, so it incorporates into the cream much more smoothly. It also gives the cream a tiny bit of weight that lets it puff up. That way, you get a fluffy whipped cream that’s perfectly smooth.