How To Make A Pancake In Your Rice Cooker
Yes, this pancake hack that everyone's been talking about actually works. Simply whisk together your pancake mix, egg and water in your rice cooker and flip the on switch.
Read MoreFood. Drink. And all the things!
Yes, this pancake hack that everyone's been talking about actually works. Simply whisk together your pancake mix, egg and water in your rice cooker and flip the on switch.
Read MoreThese are my favorite cookies ever. It's not even because I like chocolate chip cookies. I love these cookies because of how happy they make my loved ones.
Read MoreWe don't really have seasons in California. As much as I do love that, I sometimes yearn for colder weather -- an excuse to stay in inside to bake. There's something about staying in when it's cold outside with your oven fired up and your kitchen filling with the smell of baked scones.
Read MoreAs I wandered the aisles of a local Gelson's this unusual fruit caught my eye. Dubbed pluots, I decided to learn a little more about these plum-apricot hybrids.
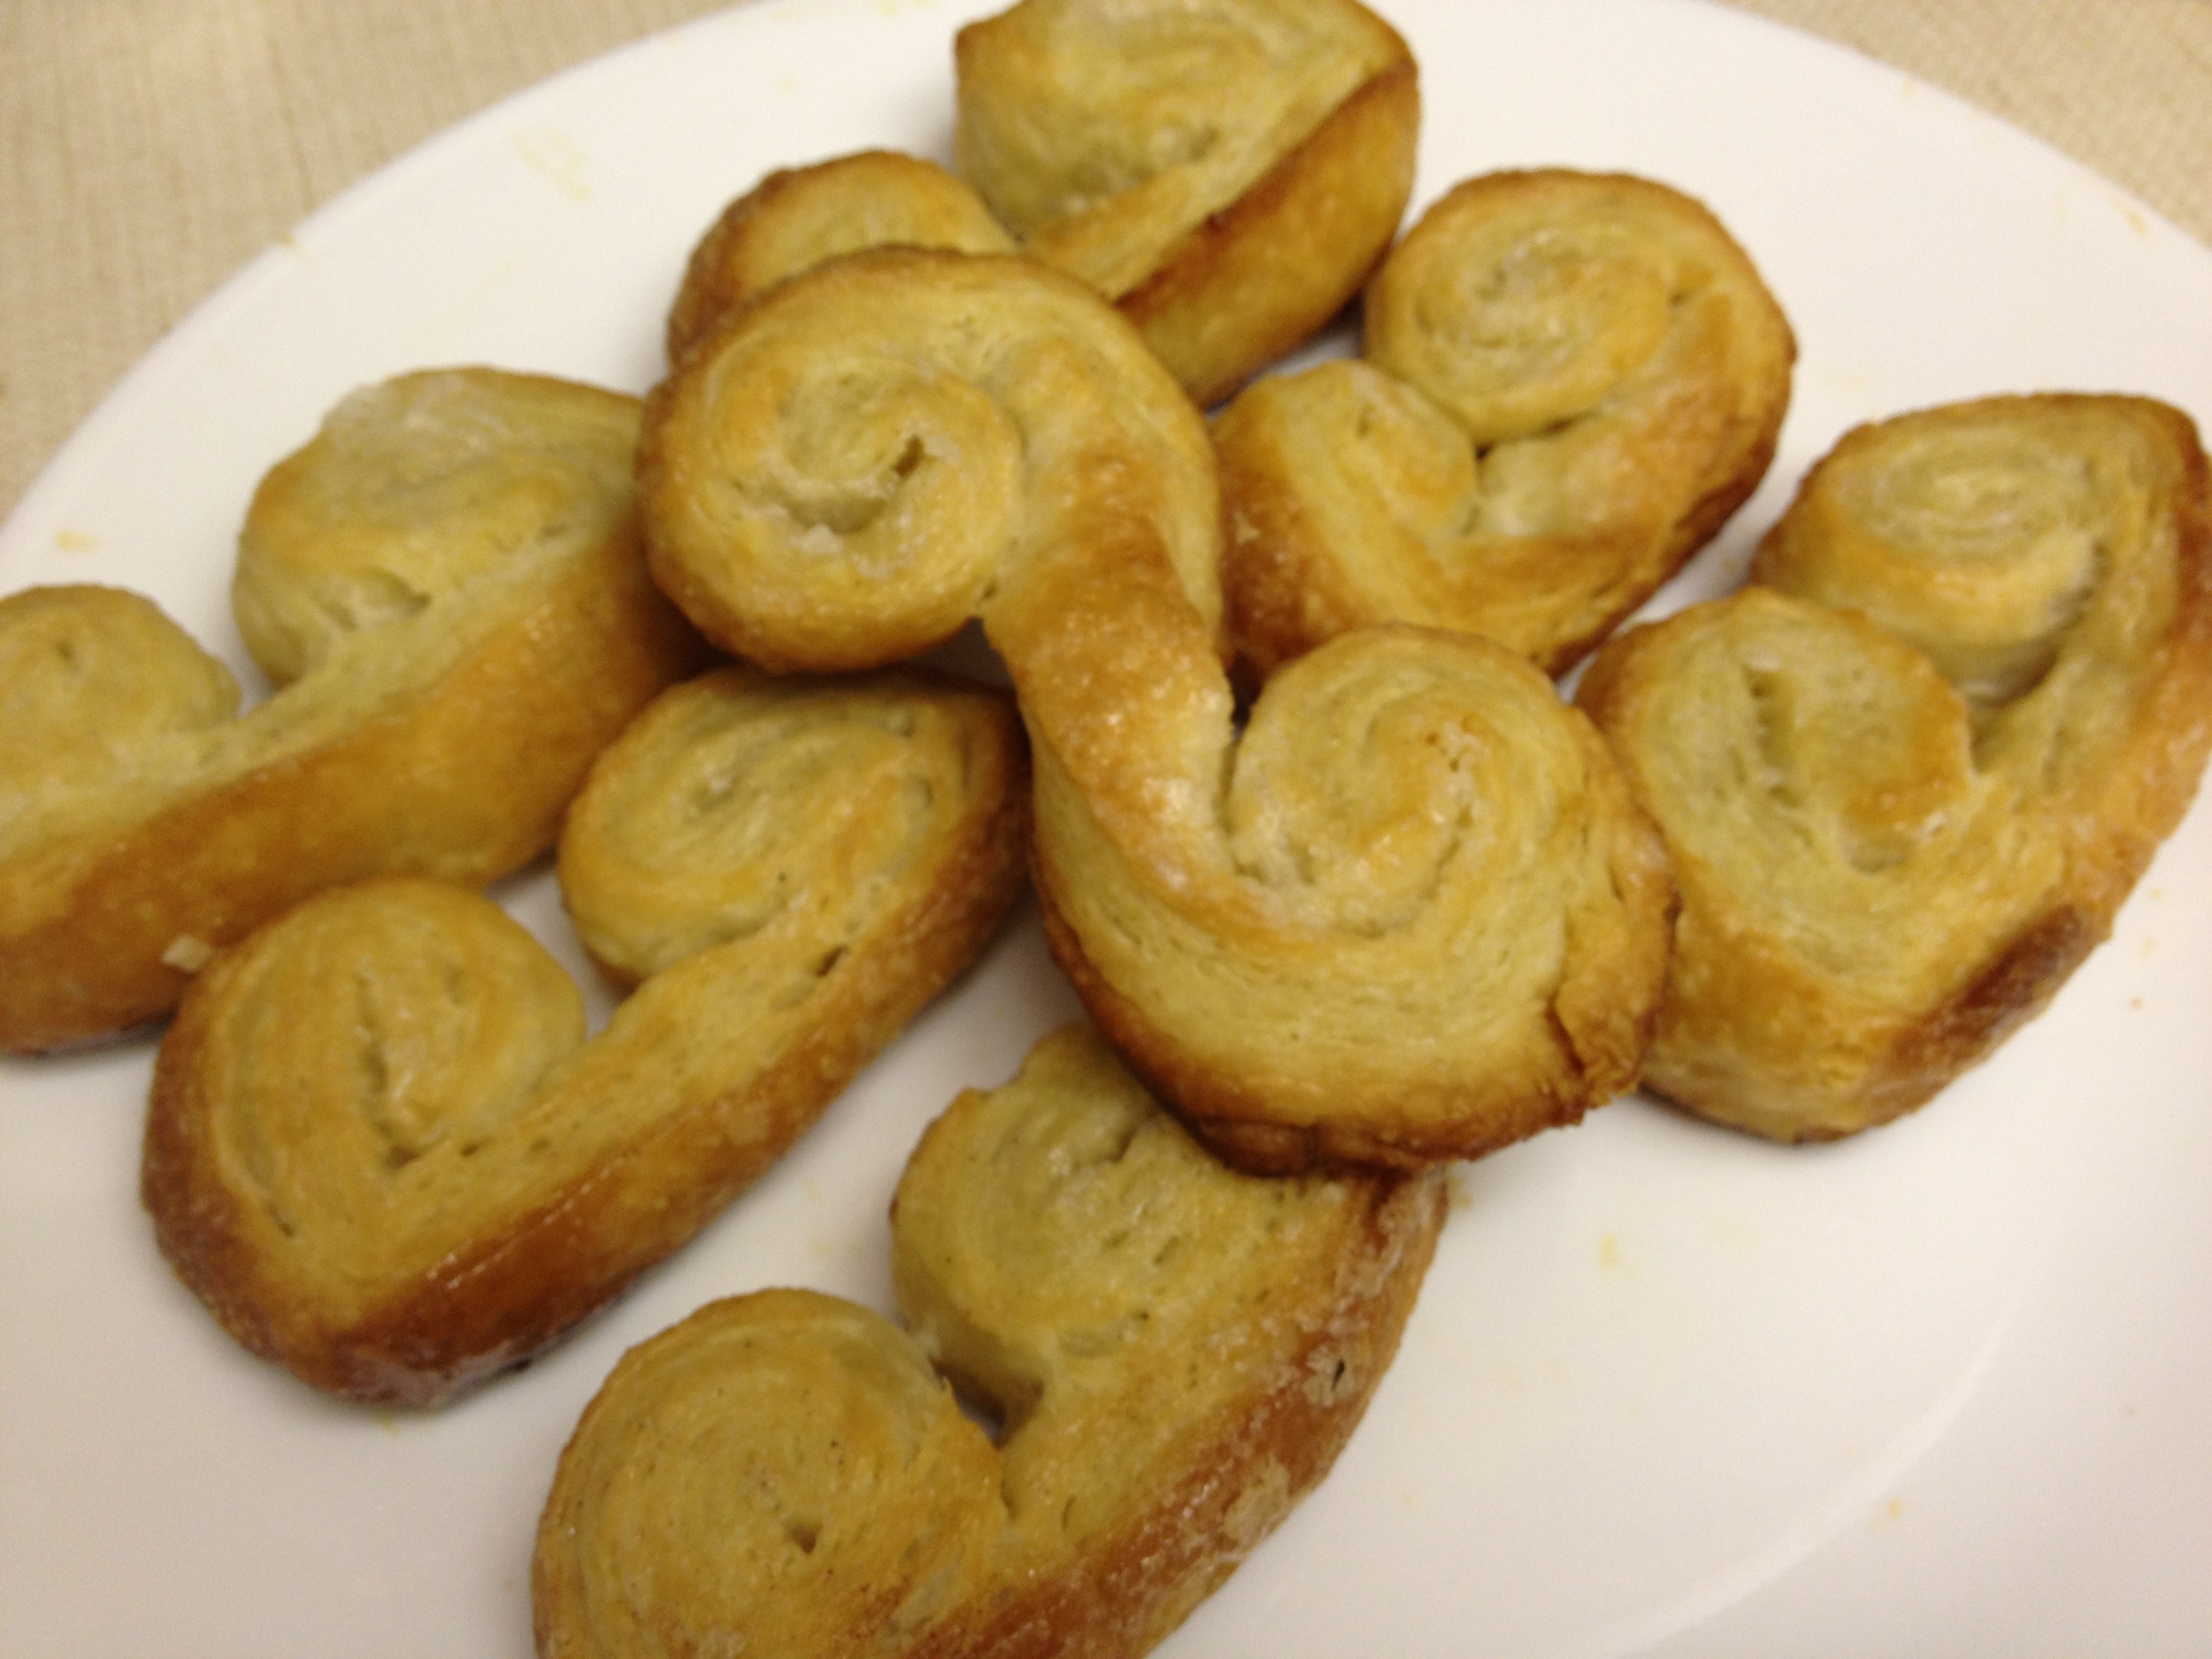
Read MoreYou know those really cute, really sweet, really crunchy cookies that are rolled up to look similar to elephants' ears? I don't like them. I don't understand their use. You never see them at parties and you never hear your girl friend say, "You know what sounds delicious? Elephant ears!" I can only imagine these cookies at a tea party, the guests obligingly biting into them after having scarfed down all the mini cucumber sandwiches and scones. And so, when my chef instructor at Le Cordon Bleu recommended we make these Palmiers puff pastries, I paid attention to her demonstration of preparing the cookies, but then blew it off mentally. Why don't I like these cookies, you ask? They're too sugary. They're too crunchy. You bite into one, and instantly, crumbs go flying about in every which way but into your cupped hand held up eagerly to catch the mess below your mouth. But alas, after class, I had more leftover puff pastry dough than I knew what to do with. (After all, I couldn't subject my arteries to making any more Brie en Croute.) So I decided to give these Palmiers a try. But I baked them at a lower temperature so they had a lightly crispy, totally flaky outer layer, but soft inside.

Serves: 12-16 cookies Prep time: 5-10 minutes Cook time: 20-25 minutes
Ingredients About 8 ounces Puff pastry dough - 1 store-bought sheet or homemade 1/3 cup sugar 2-3 tablespoons cinnamon A cup of water
1. Preheat oven to 375 degrees.
2. Roll out the dough into a rectangle, about 1/4" thickness.
3. Mark the middle lengthwise, just by putting a small indentation with your index finger.
4. Lightly coat the whole surface of the dough with water.
5. Mix cinnamon and sugar in a bowl and sprinkle over the whole surface of the dough, coating an even layer of sugary oodness.
6. Gently roll up each side of the puff pastry dough to that middle indentation point. Leave a 1/4-1/2" space in the middle,
7. Slice the dough in 1/2" pieces, then move to a parchment-lined baking sheet, laying them on their sides.
8. If you have some leftover cinnamon-sugar, you can sprinkle it lightly onto the cookies.
9. Bake cookies until light golden brown, about 20-25 minutes. But to be safe, check them at 15 minutes.
My Notes: What if I want crunchier cookies? For a crunchier cookie, bake them at 425 degrees until golden brown. This will take less time, of course, and will likely be finished in 8-10 minutes.
Recently, at a friend's BBQ, someone made these incredible mini apple pies. They were comforting, homey, crunchy, sweet -- everything a good pie is. Even though I was full, I scarfed down a few of these suckers, unable to contain myself. Between mouthfuls of pie, I vowed I was going to make these at home. But then I recalled watching my friend make them. Dough, eggwash, pie filling, apples, spices and flour were spread all over the counter as she hurriedly filled and pressed together pieces of dough. It looked like... So. Much. Work. Don't get me wrong -- the pies came out perfect. They were little, golden, crusty pockets of heaven. But between working full-time and going to school every evening, I wouldn't be able to justify spending several hours on pie, particularly when much of the labor is in the assembly process. So I cut a few corners, partially working off the back of my Pillsbury pie crust box and this recipe from Smitten Kitchen. My recipe includes both an apple pie filling and a peach pie filling. Read on and you'll learn how to make these mini pie cookies in no time.

Serves: About 6 Prep time: About 45 minutes Cook time: About 25-30 minutes
Ingredients: 1 9-inch roll of Pillsbury Refrigerated Pie Crust 1 egg, beaten 1 teaspoon water
For apple filling (for 6 mini pies): 1-1.5 Golden Delicious or Granny Smith apples 1/4 cup white sugar 2 teaspoons ground cinnamon 1/4 teaspoon ground nutmeg Small pinch of kosher salt (less than 1/4 teaspoon) A few squirts lemon juice, optional (to prevent apples from browning)
For peach filling (for 6 mini pies): 1 8-ounce can peaches 3 tablespoons white sugar 1 teaspoon ground cinnamon
1. Preheat oven to 350 degrees.
2. Prepare pie dough: Roll out the pie crust to about 1/4 inch thick. Get two differently sized cookie cutters (or drinking glasses) and cut out little circles. Cut out six 3" circles and six 3.75" circles.
3. Prepare eggwash: Beat the egg in a small bowl. Add 1 teaspoon water and mix.
4. Create apple filling: Mix sugar, cinnamon, nutmeg and salt in a bowl. Peel and chop apples into little squares (about 1/8" thick, 1/4" squares). If they start to turn brown, squirt with some lemon. Toss apples into the sugar-spice mixture.
4. Or create peach filling: Drain the peaches. In a bowl, combine with sugar and cinnamon.
5. Assemble the mini pies: Put some water in another small bowl. Roll up a paper towel and dip it in the water. Moisten a 3" circle of pie crust with the paper towel. Spoon a small amount of filling onto the circle. Cover with a 3.75" circle of pie crust and press the sides to close. Crimp the edges with a fork. If desired, cut three little slits on the surface of the mini pie (refer to picture.) Repeat on all the dough.
6. Brush each mini pie with egg wash. Place pies on a baking sheet lined with parchment paper or silicon baking mat. Bake in oven until light golden brown, about 20-25 minutes.

My Notes: Why Golden Delicious or Granny Smith apples? These apples are pretty sturdy, so their firm texture holds up during the baking process. Plus, they both have a crisply tart taste. Golden Delicious apples tend to be a bit sweeter, while Granny Smith ones tend to be more on the sour side. Simply choose the variety you prefer.
Why canned peaches? Aside from requiring less preparation time and effort, canned peaches are much softer and sweeter than the fresh kind. As a result, you'll have a gooey, sweet filling for your mini pies.
But the Pillsbury Pie Crust box says to use a baking time of about 425 degrees: Baking these tiny pies at a lower temperature ensures they get cooked through and reach a lovely golden brown before getting a chance to burn.
Why use egg wash? This egg-water mixture provides a glossy finish to the pies, and helps keep them from burning.
Can I use different filling? Of course! You can use whatever filling you'd normally use in a pie.
What do I do with any extra filling? Um... eat it!
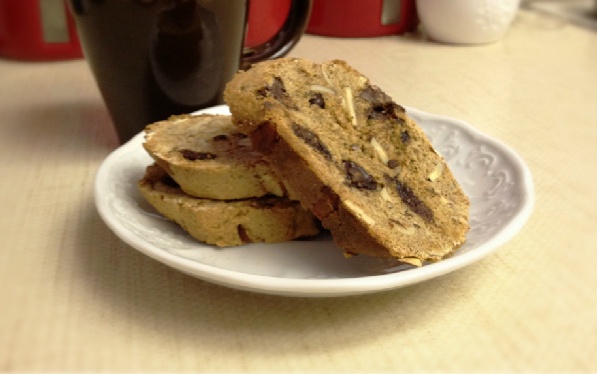
I don't know about you, but whenever I have coffee, I have the irresistible urge to drink it with something sweet. Cookies. Pie. Cake. So every morning I either finish my coffee with an unsatisfied sweet tooth or a guilty conscience, knowing full well I wasted too many calories on some store-bought pastrty. To avoid these feelings of unfulfillment and self-loathing, I did a quick search for a healthy biscotti recipe and struck gold. This MyRecipes recipe calls for whole wheat flour and flaxseed but don't worry -- there are still dark chocolate and almonds. The best part? Each crunchy cookie is less than 100 calories (and offers a decent dose of protein and fiber)...

Makes: About 30 cookies Prep time: About 30 minutes Cook time: About 35 minutes
Ingredients: 2 cups whole wheat flour 2 tablespoons flaxseed 1/2 teaspoon baking soda 1/4 teaspoon kosher or sea salt 1/3 cup white sugar 1/3 cup dark brown sugar 2 large egg whites 1 large egg 1 teaspoon vanilla extract 1 teaspoon almond extract 2/3 cup dark chocolate chips 3/4 cup unsalted sliced almonds
1. Preheat oven to 350 degrees.
2. Combine flour, flaxseed, baking soda, and salt in a bowl, stirring with a whisk. Using a mixer, combine sugars, egg whites, and egg in a bowl, and beat at high speed for 2 minutes. Add vanilla and almond extracts. Add the dry mixture (flour, flaxseed, etc.) to sugar-egg mixture; stir until combined. Fold in chocolate and almonds.
3. Divide dough into 3 equal portions. Roll each portion into a 6-inch-long roll. Arrange rolls 3 inches apart on a baking sheet lined with a silicon baking mat or parchment paper. Bake at 350° for 22-25 minutes or until firm and light golden brown.
4. Remove rolls from baking sheet; cool 10 minutes on a wire rack or separate plate. Using a serrated knife, cut rolls diagonally into 30 (1/2-inch) slices. Place back onto the baking sheet, cut sides down.
5. Bake at 350° for 5-6 minutes, turn cookies over, then bake additional 5-6 minutes. Cookies should be slightly soft in center. Remove from baking sheet; cool on wire rack or separate plate. Cookies will harden when they cool.

My Notes: Why use a serrated knife? This is especially important because the sharpness of a serrated knife easily cuts through the crunchy but yielding cookie loaf. You need only very little pressure to slice through. If you used a chef's knife (yes, even a sharp one), you'd have to exert more force and run the risk of crumbling the cookies.
Why use almond extract? The whole wheat and flaxseed are enough to overwhelm the nutty flavor, so adding a bit of extract livens it up. If you don't have almond extract, try 2-2.5 teaspoons vanilla extract.
Whole or sliced almonds? The original recipe seems to call for whole almonds, but I find them to be unwieldy in such a small cookie. Sliced almonds are not only easier to eat, but easier to fold into the dough.
Why change the baking temperature? I chose not to lower the temperature when I baked the cookies the second time because I wanted to ensure a crispy, crunchy texture -- not a stale one. Lower temperatures mean slower cooking time, which gives the dough more time to cook slowly and softly.
Red velvet pancakes. Need I say more? Whenever I hear the words "red velvet" my ears instantly perk up. Cake? Cookies? And this time, pancakes? A friend of mine linked me to this recipe not too long ago and just by glancing at the ingredient list, I could tell this was a must-eat. So I zipped over to the grocery store and stocked up on the necessities. Even though many of the ingredients weren't already lurking in my kitchen, it was well worth it. It was easy to make and difficult to screw up. The end result is moist, fluffy and absolutely irresistible. I wish I could brag that I made all sorts of changes to the recipe, but I didn't change much at all. The full credit goes to a food blog called From Portland to Peonies.

Serves: About 6 Prep time: 20 minutes Cook time: About 10 minutes
Ingredients: 1 cup all-purpose flour 1 teaspoon baking powder 1/2 teaspoon baking soda 1/4 teaspoon salt 3 tablespoons white sugar 2 tablespoons unsweetened cocoa powder 1 large egg, lightly beaten 3/4 buttermilk 1/4 cup sour cream 3 tablespoons unsalted butter, melted 1 tablespoon red food coloring 2 teaspoons vanilla extract Maple syrup or whipped cream (optional)
1. In a large bowl whisk together the dry ingredients first. Add in the egg, buttermilk, sour cream, melted butter, red food coloring, and vanilla extract. Mix until combined.
2. Heat a frying pan or griddle over medium high heat. When hot add non-stick cooking spray, followed by a small scoop of the batter. Wait for the pancakes to bubble, about 2 minutes, flip and cook for a minute or two more. Top with a pat of butter and maple syrup, or whipped cream.
My Notes: Creme fraiche or sour cream? If you're like me, you probably frequent grocery store chains like Ralph's or even Whole Foods. Creme fraiche can be hard to find, so I made these pancakes with sour cream -- and I wouldn't change a thing.
More vanilla and baking soda: I love the fragrant, floral sweetness of vanilla, so in this recipe, I added a little dash extra. I also used extra baking powder to ensure a fluffy yet dense pancake.
Make it dessert: A friend of mine declined the butter and decided to take this treat to the next level. Instead, he added a generous scoop of vanilla bean ice cream. Ice cream makes just about any food better, and these red velvet pancakes are definitely no exception. If you decided to go with ice cream topping, you may want to make your pancakes a tad smaller. The portions will be less filling and ultimately, less guilt-inducing!
Warning: for chocolate lovers only. This recipe was so easy, so delicious, I mastered it in one try. The result is a sweet, soft chocolate cupcake with a glossy, smooth chocolate ganache top. I'll have to credit Giada de Laurentiis with this one, though I'm proud to say my version has a few substitutes, ricotta cheese and a little extra sugar. Though this cake may take awhile -- about 3 hours total, including prep, cooking and cooling time, it's sure to be a party favorite. The recipe makes at least two dozen treats that your friends won't be able to turn down.

Makes: About 25 Prep time: About 1 hour Cook time: About 1 hour
Ingredients: Cupcakes 5 ounces unsweetened chocolate, chopped 1 cup water 1/2 cup ricotta cheese, at room temperature 2-1/4 cups sugar 1 cup vegetable oil 3 large eggs 1 tablespoon pure vanilla extract 3 cups all-purpose flour (sifted, preferably) 1 teaspoon baking soda 1 teaspoon fine sea salt 1/2 teaspoon baking powder 1 cup semi-sweet chocolate chips
Ganache 1 cup semi-sweet chocolate chips 2/3 cup heavy whipping cream 1 teaspoon vanilla extract 1 tablespoon sugar (optional)
1. Line cupcake pan with paper liners (or arrange foil cupcake wrappers on a baking sheet) and preheat oven to 325 degrees.
2. Combine the unsweetened chocolate and water in a small saucepan over medium-low heat. Stir constantly until the chocolate is melted, about 2 minutes. Cool for 2 minutes. Whisk in the ricotta cheese until the mixture is smooth.
3. Beat the sugar, oil, eggs, and vanilla in your mixer. Stir in the chocolate-ricotta mixture. Then add the flour, baking soda, salt, baking powder, and chocolate chips. Stir until just blended.
4. Transfer the mixture to a large mixing bowl with spout and pour into the cupcake pan. Alternatively, you can use an ice cream scoop or large spoon to add the mixture to your pan. Allow batter to rest for about 10 minutes.
5. Bake cupcakes for 20-25 minutes or until a toothpick inserted into the center of the cupcake comes out with a very thin -- barely visible -- layer of chocolate. Cool the cupcakes completely before dipping in ganache, about 1 hour.
For the ganache: 1. Combine the heavy cream, vanilla extract and sugar in a small saucepan over medium-low heat. Cook until small bubbles appear on the outside edge of the cream. Pour the hot cream mixture in a bowl, over the chocolate chips. Whisk gently until all the chocolate is melted and the mixture is smooth, about 2-5 minutes.
2. Dip the tops of each cupcake in the ganache and transfer to a baking sheet. Place the dipped cupcakes in the refrigerator to set, about 20 minutes. Allow cupcakes to return to room temperature before serving.
My Notes: Mine vs. Giada's: The first time I made this I had trouble finding mascarpone at the store, so I substituted it for ricotta cheese instead. Ricotta is light and airy and creamier than it is cheesy -- three very important elements when baking a goodie. Also, when I was making the ganache and taste-testing it, I felt it wasn't quite sweet enough. I prefer it with a tablespoon of sugar. If you choose to add it too, make sure you add it in the saucepan while you're heating the cream and vanilla in order to make sure the grains are incorporated well.
Why go semi-sweet and unsweetened? The reason it's a good idea to stick with the semi and un-sweetened chocolate is so you can control the level of sugar that goes into your cake. I love sweets just as much as the next person, but there's no greater buzzkill than when you realize you can't finish a cupcake because your teeth start hurting halfway through.
Why let the cupcakes "rest?" I learned this one from Giada! Allowing the batter to sit in the baking pan before popping it in the oven results in puffier cupcakes. This recipe should result in a puffy top so it best holds the ganache -- plus, you want a wider surface for that sweet chocolate casing.
When do I use foil cupcake wrappers? When you don't have a cupcake pan, of course. I only have one cupcake pan so sometimes it's easier for me to use the foil wrappers and arrange them on two baking sheets rather than waiting for my first batch of cupcakes to cool before baking the next one.
What: Macarons Where: Paulette Beverly Hills
Must Order: Rose; caramel

The Verdict: I'll start out by saying that I'll never post a negative review on this site. I figure, if it's not delish, it's not worth writing about. But just how delish are Paulette Koumetz's and Christophe Michalak's macarons? Delish megish, indeed. These little masterpieces had me raving that macarons are the new cupcake.
I didn't know much about macarons before I tasted several different kinds at Paulette, but it was definitely love at first bite. Though they're pretty pricey (individual macarons are $1.60 each; 1 dozen is $19) they're well worth the occasional splurge. These kosher dairy delights are light and airy with the right amount of richness. The exterior has the slightest crunch and the center is perfectly gooey.
I haven't tasted a single one I didn't like but my favorite one was the rose macaron. Fluffy and floury, these little puffs are made with a little bit of rosewater for that unique flavor. Chocolate lovers will enjoy chocolate-stuffed chocolate shells and pistachio aficionados will marvel at the soft, smooth centers of the green macarons. If you want an even sweeter treat, try the caramel, which has a sugary, sticky filling.
I’m actually not the biggest fan of mousse. It’s usually too chocolate-y or too bland, too soft or too sweet. Too something. But this recipe, taken straight from the Food Network’s Giada De Laurentiis herself, has just the right consistency – and with a few of my own tweaks, just the right level of sweetness. It’s super easy and best of all, it doesn’t require any cooking.

Serves: about 10 Prep time: 20-25 minutes
Ingredients: 2 cups whole milk ricotta (or 1 15-ounce container) 3/4 cup of strawberry preserves or jam (can be substituted for your favorite preserves or jam) 1 cup heavy whipping cream 1/4 cup powdered sugar
1. 1 cup of strawberries (or the same kind of fresh fruit as your jam) Either in a food processor or mixer, blend the room temperature ricotta cheese until it’s smooth and fluffy (usually about 30 seconds in a food processor, or 1 minute in the mixer). Add the jam and blend until combined, about several seconds until you get that nice, light pink color. Transfer to a large mixing bowl.
If you’re like me and your kitchen appliances are both small and limited, you’ll probably need to wash and dry your mixer. You’re going to whip the cream, so you’ll want to make sure you have a clean mixer to make sure the cream becomes the right consistency.
2. Beat the cream on medium-high speed until thick, about 5 minutes. Add the powdered sugar and crank up the speed. Blend until the cream holds stiff peaks, about 5-7 minutes longer.
3. Fold (or gently mix) the whipped cream into your ricotta-jam mixture in small batches.
4. Refrigerate 1 hour prior to serving. When ready, use an ice cream scoop to plop a generous portion onto your serving bowls. I use one hefty scoop per serving. Garnish with your fresh fruit and enjoy!
My notes: Mine vs. Giada’s. When I first whipped up this dessert, I followed Giada’s recipe down to the last measurement. While I was happy with the texture, I felt the end result was a bit too ricotta-y and not quite sweet enough. I like a little extra jam and powdered sugar.
Which jam? Giada’s original recipe actually calls for raspberry jam. I’ve also seen this made with blueberries! Feel free to use whichever preserves or jam you like – it’s probably a good idea (for your wallet!) to choose one that’s on sale. Just don’t use jelly! You want the full-bodied taste of real fruit, and that’s a taste you get only from preserves or jam.
Why whole milk ricotta? For a more calorie-friendly treat, you could go with skim milk ricotta. I just prefer using whole milk to get a richer flavor and that perfect mousse-y texture. Also, when you’re making recipes with so few ingredients, it’s important to make sure they’re good quality. Using fewer ingredients means you can’t hide the tastes of cheap items!
Why powdered sugar? Powdered sugar is much lighter than granulated, so it incorporates into the cream much more smoothly. It also gives the cream a tiny bit of weight that lets it puff up. That way, you get a fluffy whipped cream that’s perfectly smooth.